USC’s Fall 2023 semester is up and running. Columbia has flourished as the students are back and our campus is packed. Now, with course content regularly distributed throughout digital platforms, how accessible is that content? Microsoft Word and PowerPoint contain an Accessibility Checker tool to help answer that question.
Microsoft Accessibility Checker
This Accessibility Checker automated tool identifies many accessibility errors and warnings of potential accessibility issues. In the latest versions of Word and PowerPoint this tool is actively running in the background as an “accessibility assistant” to guide you towards more accessible content.
Below is how to use Accessibility Checker and 4 accessibility best practices that Accessibility Checker can help with, but first...
What is "Accessible Content"?
Most of our past blog posts have been focused on the bigger picture of digital accessibility and disabilities.
Digital accessibility applies to best practices that make it possible for people with disabilities to perceive and navigate through all your provided digital content – text and non-text content (e.g., images). Accessible content is content designed with accessibility best practices applied throughout the process of developing and delivering your content to your audience, including our students.
Accessibility and Assistive Technology
People with disabilities often depend on specific assistive technology (AT) tools to perform certain functions. The purpose of these tools is to increase the ability to access your provided information. Three examples of AT include:
- Keyboards are a type of AT for those limited from using a mouse.
- Screen magnification increases the content size on a device screen.
- Screen readers are used to read aloud document content, application functions, and anything else provided on the screen. This tool is most often used by people that are blind. Others that live with learning, reading, and processing disorders use similar tools to hear your content.
Accessibility Checker in Practice
To open the Accessibility Checker in Word and PowerPoint:
- Select Review tab.
- Select “Check Accessibility” option from the Check Accessibility button drop-down menu.

Let us apply Accessibility Checker to help with 4 important accessible content best practices:
Alternative (“Alt”) Text
Alt text is used to convey the meaning and purpose of any non-text visuals included in your content (e.g., images, charts, complex visualizations). Alt text is also commonly referred to as alternate text, image description, object description, and alternative description.
Accessibility Checker & Alt Text
Shown in the Accessibility Checker below are multiple Errors of “missing object description”. This means those pictures within your document or slide deck contain no alt text.
Also shown are Intelligent Services “review auto-generated description” results. Microsoft apps, including Word and PowerPoint, use artificial intelligence (AI) to try to identify objects in the image and provide a brief description. As it often accurately identifies very basic information (e.g., “woman sitting on bench,” “bar chart”), it does not have the ability to accurately convey the information and purpose of what you chose to display. With that, do not use auto-generated descriptions of your images.

It is not necessary to change the name of pictures or slides listed within the Accessibility Checker, but it is necessary to choose appropriate alt text for them. Although, you can change picture names if it is beneficial for you, such as changing multiple images all named “Picture 1,” as seen in the screenshot above.
Alt Text within Word and PowerPoint
Image (object) descriptions are added as alt text:
- Right-click on image and select “View Alt Text…” menu. Alt Text pane will appear.

- Enter meaningful, concise alt text (1-3 sentences) in the textbox.
- What is the purpose of the image? What is meant to be conveyed to your readers?
- Wondering what to write? Refer to WebAIM.org’s Alternative Text article.
- Do not use automatically generated descriptions.
Headings
Most of us often visually skim through documents and articles to find a specific section or to gain a sense of its information. For screen reader users, they are granted the same benefit if appropriate headings do exist within your document. If your document lacks headings it prevents the ability for them to “skim” through the document heading-to-heading and requires them to read line-by-line.
Organize your content using proper heading order that contains only one Heading Level 1 (e.g., document main title). As heading 1 captures the main idea of the document, each nested heading contains related information. There are no limits to the number of other heading levels.
Accessibility Checker & Headings
Displayed in the Checker below, no headings were detected. All documents, especially longer documents with multiple pages, should, at least, contain a title styled as a Heading 1 and each section title styled as Heading 2.

Headings within Word
Create meaningful heading structure through use of the “Styles” within Word’s Home tab options:
- Start a new line of content or highlight existing text to set as a heading.
- Open Home tab and choose appropriate Heading from the Styles options.
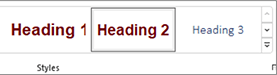
Here are examples of what you would see when selecting the appropriate heading in Windows and Mac.
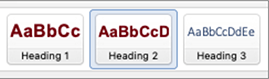
Mac version of Word Styles options
Links
Hyperlinks (best known as just “links”) within your content should be meaningful links with the function of the link being clear, especially if seen out of context.
Avoid long URLs and vague link text such as “learn more” or “here.” As shown in the example below, seeing “here” out of context prevents us from knowing what that link is associated with.
Screen reader users can skip link-to-link and can extract a list of links from your
document or webpage, such as this example:

Accessibility Checker & Links
Surprisingly, as of the date of this post, Accessibility Checker does not identify vague, ambiguous links as an error or warning:

How do we know this? Multiple types of long web addresses and vague linked content were tested that do not follow best practice.
Here’s 4 attempted examples (that were set as links in Word):
- https://www.youtube.com/watch?v=J-ZvdVMpQQk
- click here
- learn more
- here
What does this mean? We cannot solely depend on automated accessibility testing, including Microsoft Accessibility Checker.
Links Within Word and PowerPoint
Create unique, meaningful link text and avoid generic text links and long URLs using these steps:
- Highlight the appropriate content (e.g., an already existing URL or related text).
- For existing URL:
Windows: right-click and choose “Edit hyperlink” from context menu.
Mac: Control-click, select “Hyperlink,” then click “Edit Hyperlink”. - For existing meaningful text, right-click the highlighted content and choose “Link…” option from context menu.
- For existing URL:
- “Text to Display” field (seen in screenshot below) is for the meaningful link description.
- “Address” field is where the correct URL goes.
Reading Order
Reading order applies to the order a screen reader user would hear your content read aloud.
Reading order of your slides also applies to the order your content would be structured if converted to and saved as a different file format (e.g., PDF, audio).
Accessibility Checker & Reading Order
Accessibility Checker will not identify Reading Order as an “Error” but, rather, a “Warning,” as seen in example below. This is because us content creators are the deciders of the most appropriate reading order, not PowerPoint.

So, if the content on your slide is read aloud, will each element of content, pictures,
and other objects be read in a logical order? For example, let us assume this reading
order below of a slide with multiple content and objects is correct:

This means that the content is structured to which a screen reader will first read the content of Title 1, then Content Placeholder 2, then each individual object in order shown until the last Slide Number Placeholder.
Reading Order Within PowerPoint
Important differences in managing reading order appropriately do exist between the Windows and Mac versions of PowerPoint.
Windows provides Reading Order Pane AND Selection Pane to organize slide objects. Mac provides only the Selection Pane to organize slide objects.
The Reading Order pane displays slide objects from top-down. The Selection pane displays slide objects in reverse order (from bottom-up).
Here is how to be sure you have your slides structured appropriately in PowerPoint:
- Reading Order Pane (only available in Windows):
- Select Review tab.
- Select “Check Accessibility” dropdown menu.
- Select “Reading Order Pane”

- Refer to Reading Order Pane example above.
- Selection Pane (available in Windows and Mac):
- On the Home tab, select “Arrange” button.
- Select “Selection Pane”.

Again, assuming all objects in Selection Pane image below are in correct reading order,
“Title 1” listed last is correct. This Selection Pane contains the same objects listed
in the Reading Order Pane in section above:
One Accessibility Check at a Time
Start using Accessibility Checker throughout your content development regularly if you haven’t already started. As we encourage you to resolve all existing issues in your content, we acknowledge this may be brand new to you, so take this one step at a time. Do not worry about resolving every issue the Checker identifies immediately. You can start with the 4 types of accessibility best practices covered in this article. Start blending this into your process of content development. As with anything, the more you apply it, the better you will become. The better you become, the more accessible content you will provide that will benefit all your students (or whoever your audience is).
With that, remember, as we saw with links, we cannot depend on automated testing alone, but regularly using it is a great start!
To close, please take advantage of our printable, one-page digital accessibility cheat sheets that you can quickly refer to for accessibility answers. These include Word and PowerPoint cheat sheets. (These cheat sheets are allowed for your tests!)