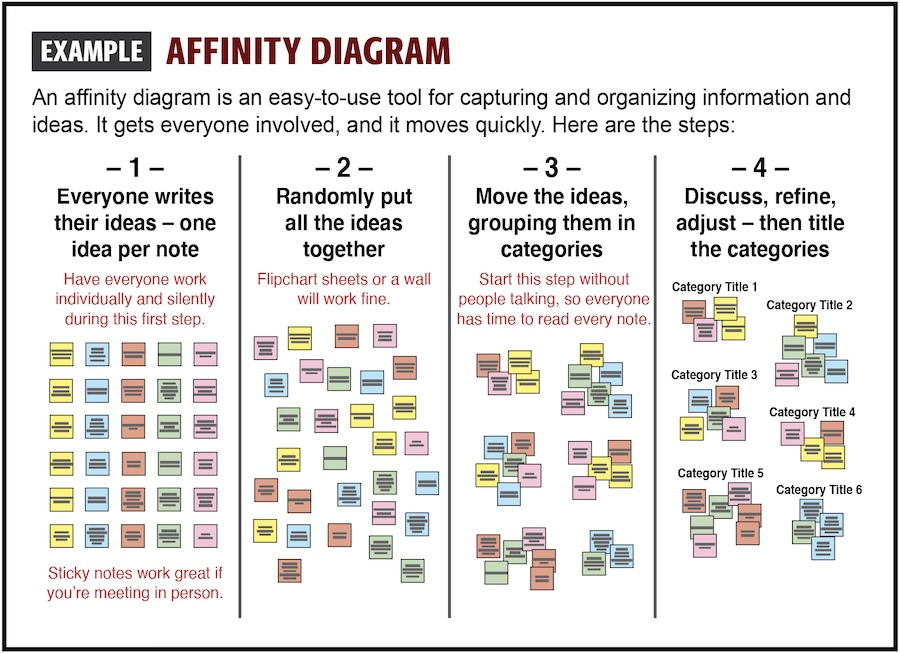
Compared to brainstorming (where people share their ideas aloud) and brainwriting (where they write ideas on pieces of paper that get passed around and added to), an affinity diagram adds something of tremendous value: sorting and categorizing. After participants document their ideas individually and without talking, they shift gears and work as a group to put similar ideas into common categories. It's a quick and easy way to organize thoughts and see where consensus is emerging.
Video: Creating an affinity diagram![]() (2:32 min.)
(2:32 min.)
Visual:
Click to expand – will open in a new window
Step by step:
1. Set the stage: Have an easy-to-understand prompt to which people will generate ideas. A question often works best. Example: "What questions should we ask in the stakeholder survey we plan to conduct?"
2. Gather the ideas: Start by having everyone write down their ideas or solutions on separate sticky notes – with a separate idea on each note. This should be a silent activity to guard against groupthink.
3. Post all the ideas: After 10 or so minutes of silent writing, people walk up and put their sticky notes on a board or wall or set of flipchart sheets. There's no need to put them in any order; they can tack up their notes randomly.
4. Find common themes: Everyone gathers to read and review all the notes. The aim is to find ideas that are similar or related, and to group these together on the wall. (That's why sticky notes are so useful here – with each idea on a separate note, they're easy to move and reposition.) It can take a while for the notes to be read and grouped into six or so categories, but it's a worthwhile exercise in which everyone learns what everyone is thinking in response to the original prompt.
5. Name the groupings: Give a title to each group of related ideas. Write these names on bigger sticky notes, and place them by the grouped ideas.
6. Make changes if needed: As a group, refine the arrangement of ideas within each category based on their importance and how they connect. In some cases, an idea might be moved to a different category, or a new category will be created. Make sure everything makes sense and is clear.
7. Put it to work: This process creates a well-organized set of ideas (in response to the original prompt) that captures the thinking of everyone in the meeting. This is rich information that can then be used to guide conversations and make decisions as you move on to the next stage of creating whatever the group is aiming to create.
|
• Set up a shared virtual whiteboard (e.g., Miro, Jamboard, Canva). |