The customer experience map is a team technique for seeing a process from the customer's perspective – not just how it works internally, but what the customer is doing, thinking, and feeling at each stage. By mapping these views side by side, teams often discover that a process that feels efficient from the inside looks like a long stretch of silence and uncertainty from the outside. The technique works best with a group of four to eight people who are directly involved in the process being examined.
Materials needed: Butcher block paper or a large wall surface, markers, sticky notes in four colors (one per lane), sticky dots, tape.
Time needed: 90-120 minutes, depending on the complexity of the process.
Works well for: Processes where customers experience long waits, uncertainty, or frustration, and the group wants to better understand the customer experience before making improvements.
Before you being: Ask everyone in the group to come prepared with a realistic sense of what customers expect from the process you'll be examining. This doesn't need to be formal – recalling recent complaints or questions, asking customers directly, or pulling from feedback the unit has already received is enough. The goal is for everyone to walk in with something real rather than assumptions.
Visual example:
Click to expand – will open in a new window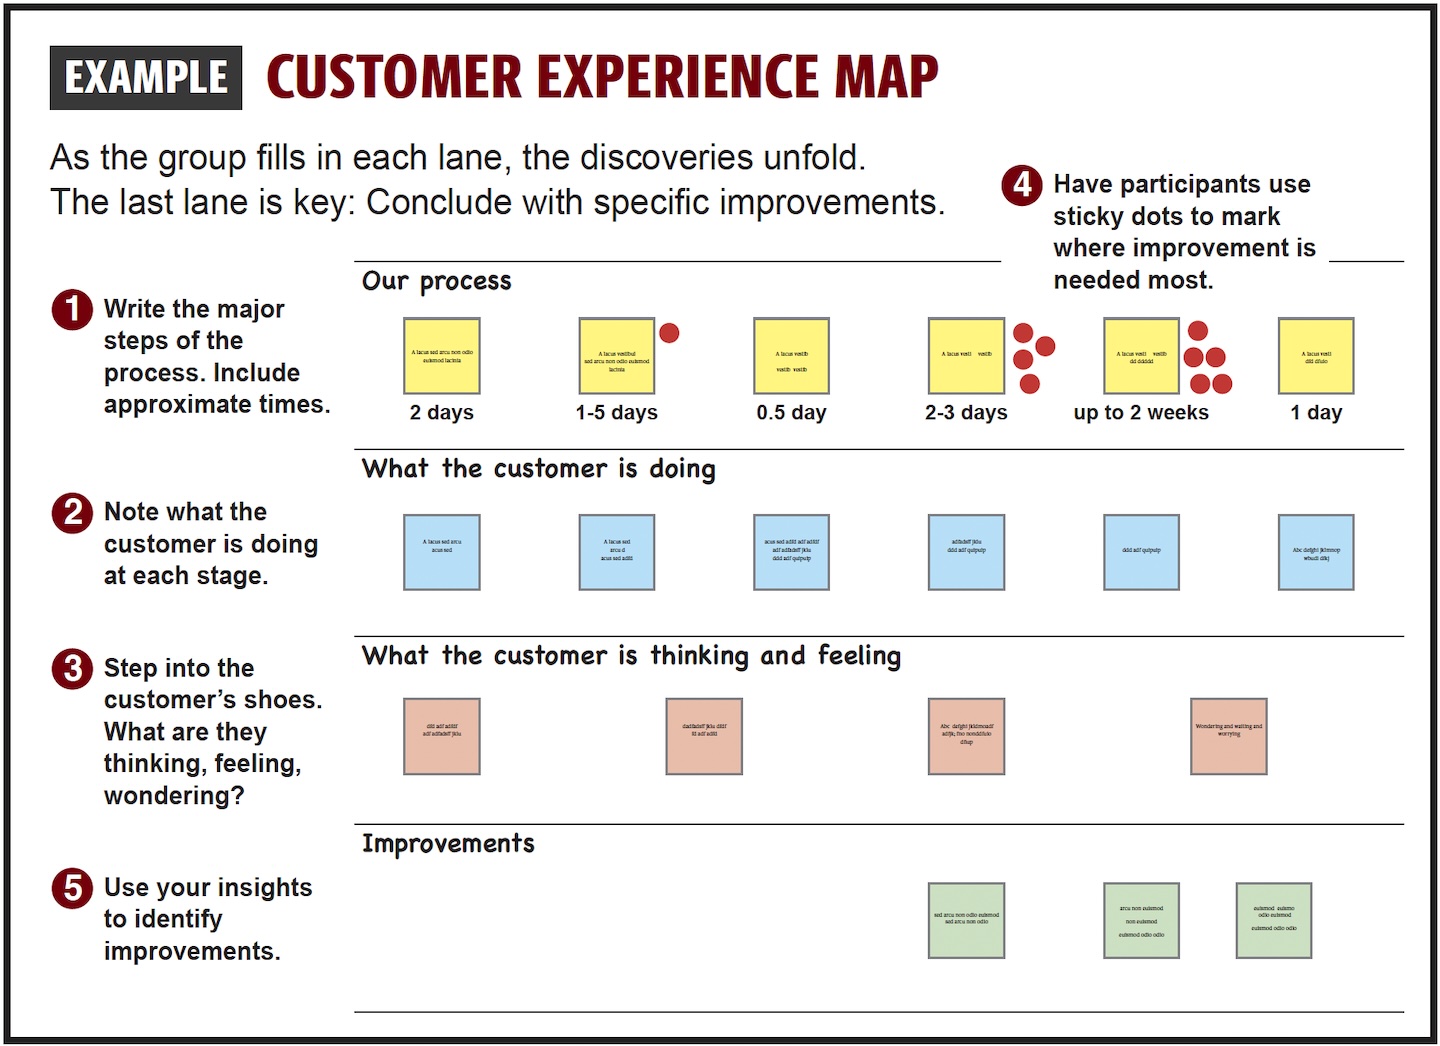
Step by step:
1. Set up your map: Roll out a large sheet of butcher block paper on a wall or table. Draw four horizontal lanes running left to right, stacked on top of each other. Label them on the left side, and assign each lane its own sticky note color so the map stays visually clear as it fills in.
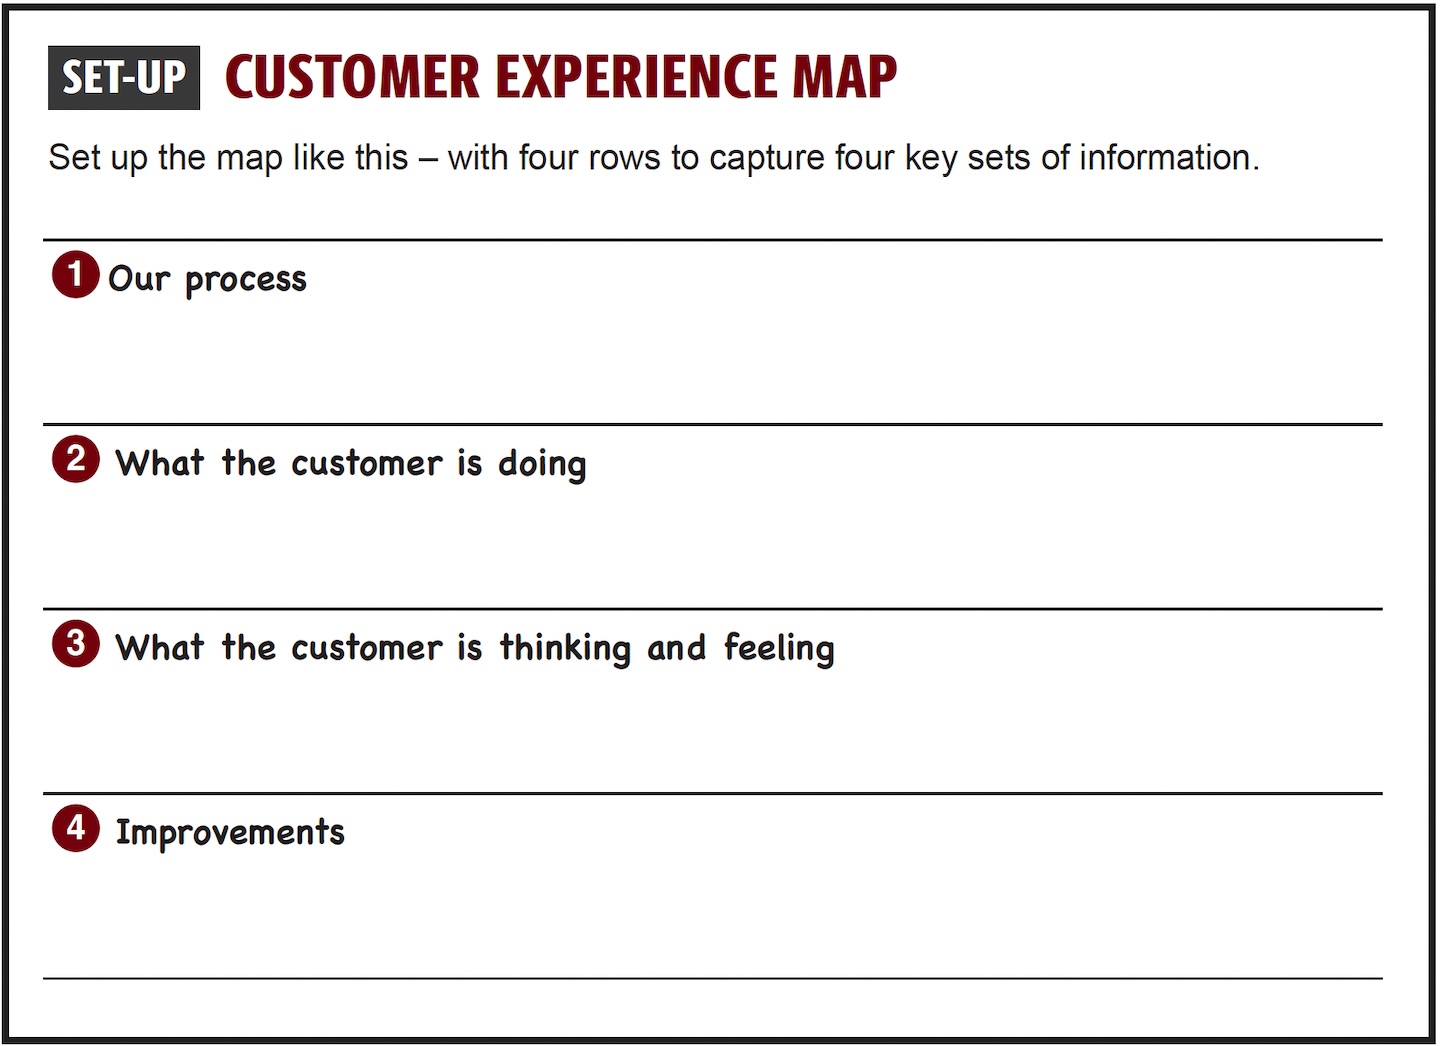
Leave plenty of space in each lane – you'll be adding sticky notes as you go.
2. Lane 1 – Map your process: Working left to right, identify the major stages of the process you're examining – no more than eight steps. Write each stage on a sticky note in the lane 1 color and place them in order across lane one. Keep it high level – this is not a detailed flowchart, just a shared picture of how the process actually runs from start to finish.
3. Estimate how long each stage takes – individually first: Once the stages are on the wall, pause before moving on. Have each person write down individually how long they think each stage takes. Then share and compare as a group. You will often find that people in the same room disagree – and that disagreement is itself an important finding. Mark the group's agreed estimates directly on the map beneath each stage.
4. Lane 2 – What is the customer doing? Directly below lane one, capture what the customer is doing at each stage using sticky notes in the lane 2 color. Ask the group: at this point in our process, what is the customer actually doing? Are they filling something out and submitting it? Waiting with no information? Following up because they haven't heard anything? Wondering if their submission was even received? Don't rush this lane. It often produces the first uncomfortable realization of the session – that while the unit is busy working, the customer is largely just waiting.
5. Lane 3 – What is the customer thinking and feeling? Directly below lane two, capture what the customer is thinking, wanting, or frustrated by at each stage using sticky notes in the lane 3 color. This is where the pre-work pays off – draw on the complaints, questions, and feedback participants brought into the room. Ask the group: what is the customer wondering at this point? What are they assuming? What are they worried about? What would they say if you asked them right now how things were going? This lane is where the gap between internal reality and customer experience becomes most visible. A stage that looks routine from the inside may be a source of significant anxiety or frustration from the outside.
6. Step back and look at the whole picture: With lanes one through three complete, ask the group to step back and look at the map as a whole. Where does the customer's experience diverge most from what's happening internally? Where is the customer waiting or in the dark while important work is happening that they can't see? Where are the biggest mismatches between what the customer expects and what actually happens?
Have participants place a sticky dot on the moments that stand out as most significant. The dots will quickly show the group where attention is most needed – and where to focus in lane four.
7. Lane 4 – What we're committing to: This is where the group moves from discovery to commitment. Use sticky notes in the lane 4 color. Work through two things:
The timeline: Looking at everything the map has revealed – and especially the dotted moments from step 6 – ask the group: what is the timeline we can honestly commit to – with the customer in mind? In some cases the answer is that the existing timeline is right, and the bigger opportunity is doing a better job of communicating it. In others, the map will have surfaced reasons to revise it. Either way, the group should leave with a timeline they have looked at honestly, agreed on, and are prepared to stand behind.
What needs to happen to make it real: In almost every case, clarifying or committing to a timeline will surface a list of action steps – things the unit needs to do differently, communicate more clearly, or start doing for the first time. These might include how customers are informed about key milestones, how the unit handles delays, or simply making sure the right people know what the timeline is and why it matters. Capture these action steps, and before the group closes, make sure each one has an owner and a realistic timeframe.
Before you leave the room: Make sure the following are captured: the timeline the group has committed to, and the specific improvements the group is committing to with owners and timeframes. Take a photo of the completed map before it comes down – it's a useful reference as the group follows through on its commitments.